The rollout of a large number of suppliers can be structured in waves to keep the project clear and manageable. In this article you can see how you structure your project into waves.
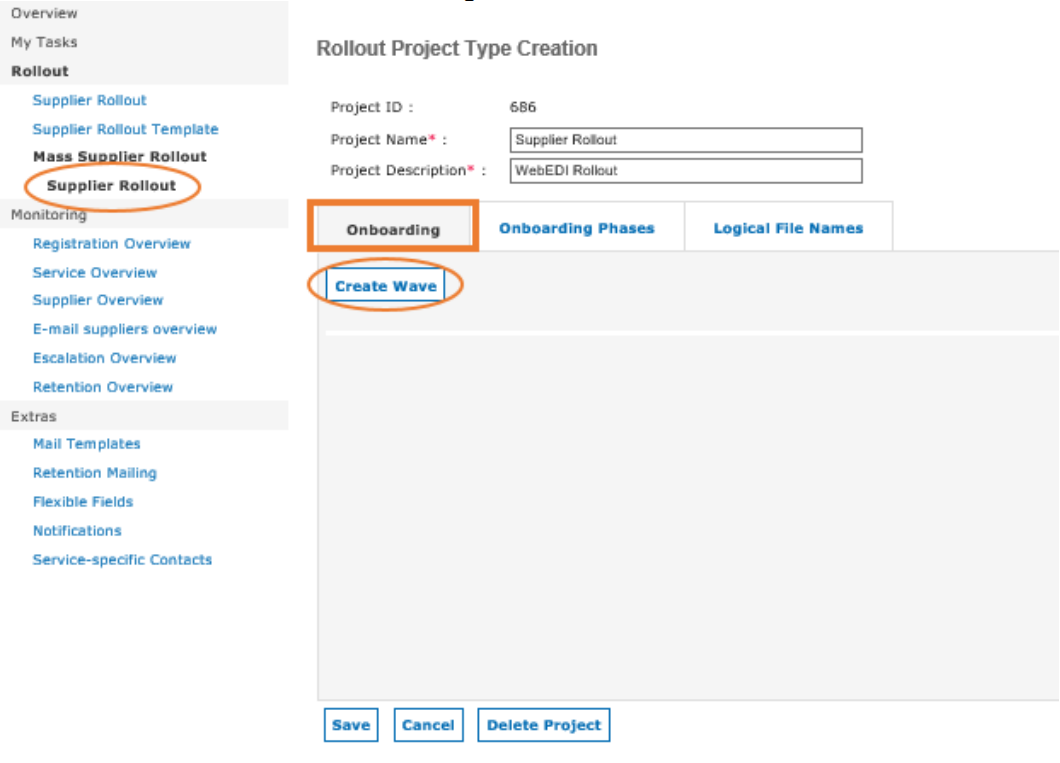
Access the now available tab ‘Onboarding’ …

… and click on Create Wave. Please note that the rollout project you are currently working in will always be shown in the menu on the left hand side under ‘Mass Supplier Rollout’.
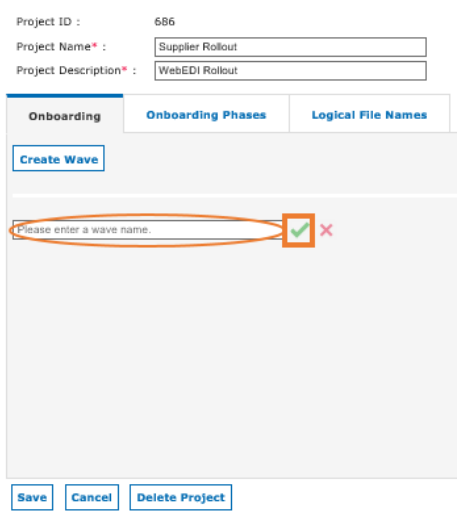
After clicking on ‘Create Wave’ you will see the following screen. Please enter a name for your rollout wave and click the green tick to save your wave.

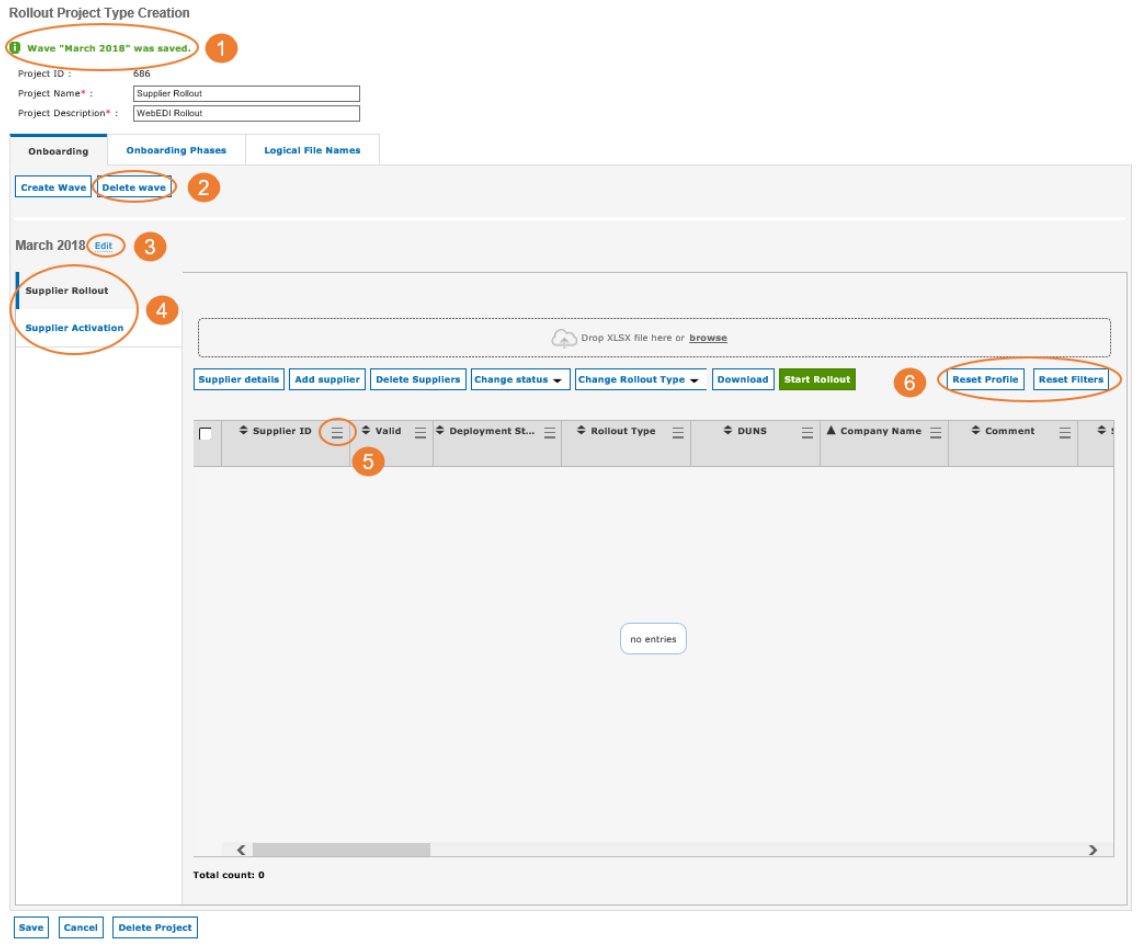
You will then see the following screen:

- At the top of the screen you will receive the information, that your wave has been saved.
After you have created a new wave, please check if all the settings you made before in the tab "Onboarding Phases" are transferred to the new wave. - You can delete your wave again by clicking on Delete Wave.
- In case you want to change your wave’s name, you can do so by clicking on Edit.
- In the ‘Supplier Rollout’ Tab you will see all the suppliers you have entered or uploaded into the tool.
As soon as you clicked on ‘Start Rollout’ the suppliers will move to the ‘Supplier Activation’ Tab. - You can organise your columns as explained in step Organise and Manage this Overview.
- Same as on the overview level, you can reset your profiles and filters with these buttons Organise and Manage this Overview.
Several Waves per Rollout Project
You can create several Waves per Rollout Project. This can be useful in case you are organising your suppliers in batches e.g. by country, buyside plant etc.
This means you don’t have to start a new Rollout Project per batch, but can just add another Wave to your existing Rollout Project.
Please note: One Rollout Project can only cover one Service (e.g. WebEDI), in case you want to start a rollout for Sourcing, you will have to create a new Rollout Project.